Throttle W/Motor Body ASSY (1NZ-FXE): Replacement
- REMOVE RADIATOR SUPPORT OPENING COVER
- Remove the 6 clips, then remove the radiator support opening cover.
 Courtesy of © TOYOTA, LICENSE AGREEMENT TMS1002
- REMOVE ENGINE UNDER COVER LH
- DRAIN ENGINE COOLANT (See REPLACEMENT
)
- REMOVE REAR FLOOR BOARD NO.2 (See REPLACEMENT
)
- REMOVE DECK FLOOR BOX REAR (See REPLACEMENT
)
- REMOVE REAR FLOOR BOARD NO.3 (See REPLACEMENT
)
- DISCONNECT ENGINE WIRE NO.3 (BATTERY NEGATIVE TERMINAL) (See REPLACEMENT
)
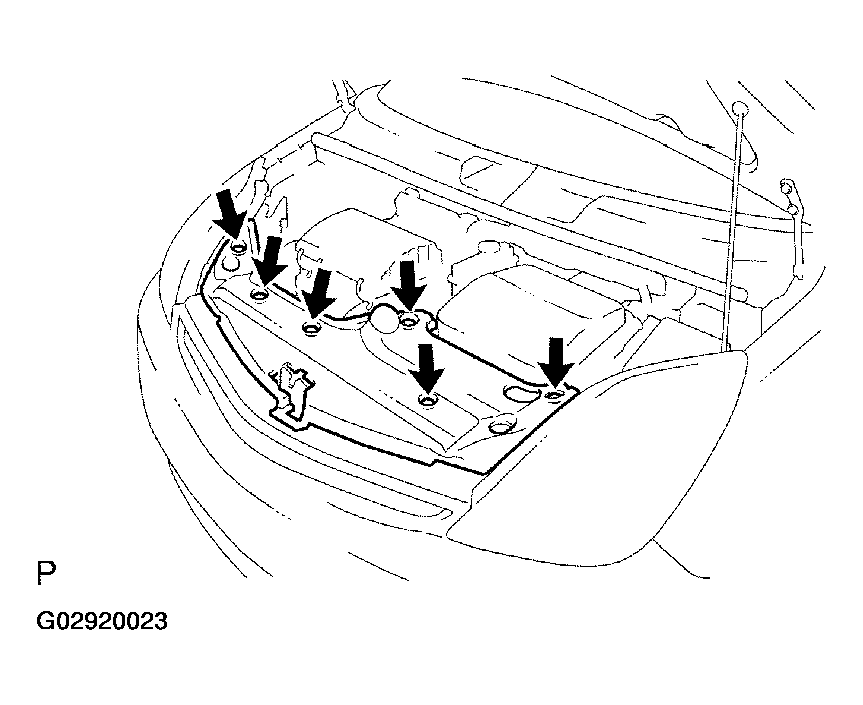
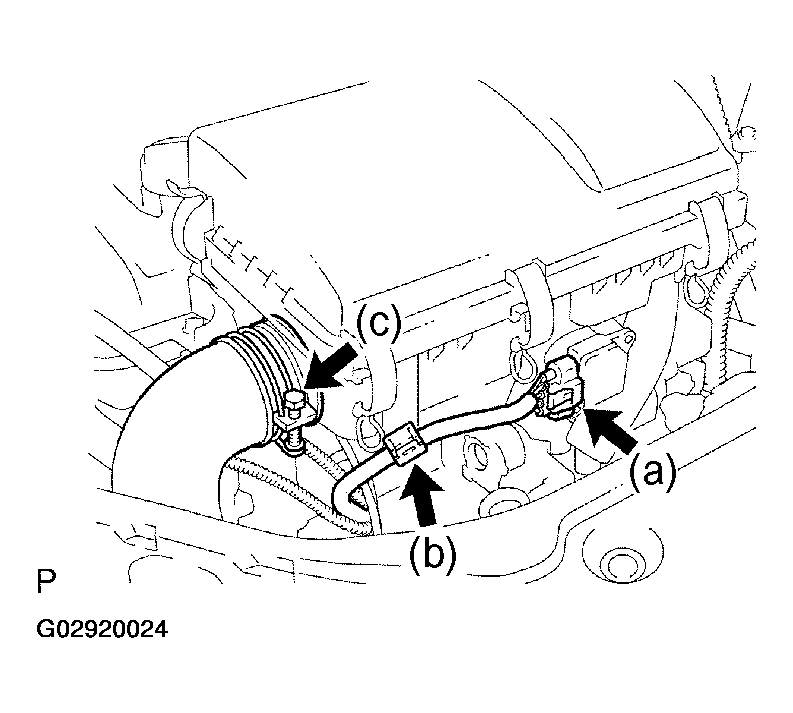
- REMOVE AIR CLEANER ASSY
- Disconnect the mass air flow meter connector.
- Remove the wire harness from the wire harness clamp.
- Loosen the hose clamp bolt, then disconnect the air cleaner inlet No. 1.
 Courtesy of © TOYOTA, LICENSE AGREEMENT TMS1002
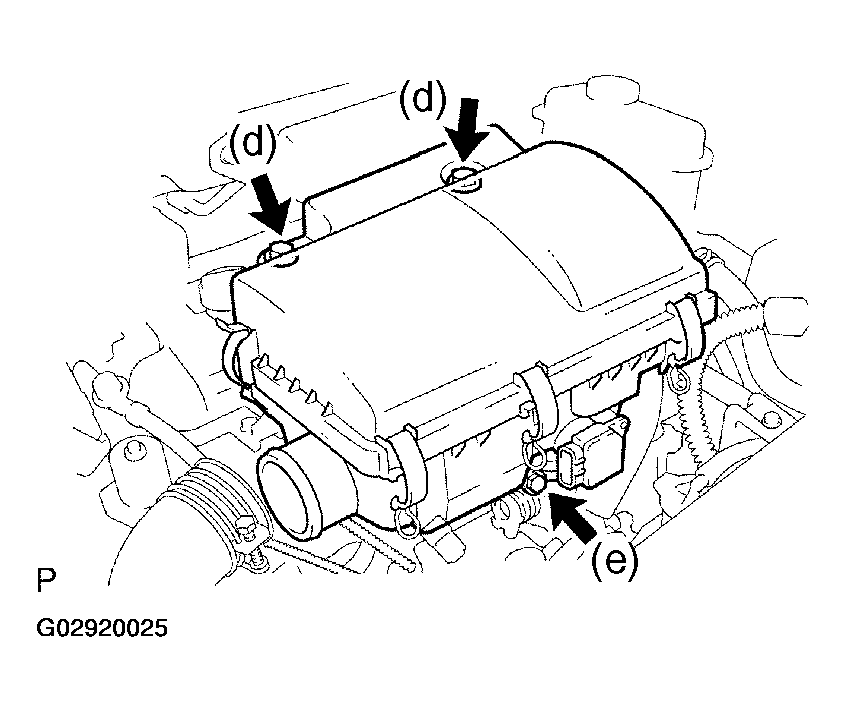
- Remove the 2 bolts.
- Loosen the hose clamp bolt, then remove the air cleaner.
 Courtesy of © TOYOTA, LICENSE AGREEMENT TMS1002
- REMOVE THROTTLE W/MOTOR BODY ASSY
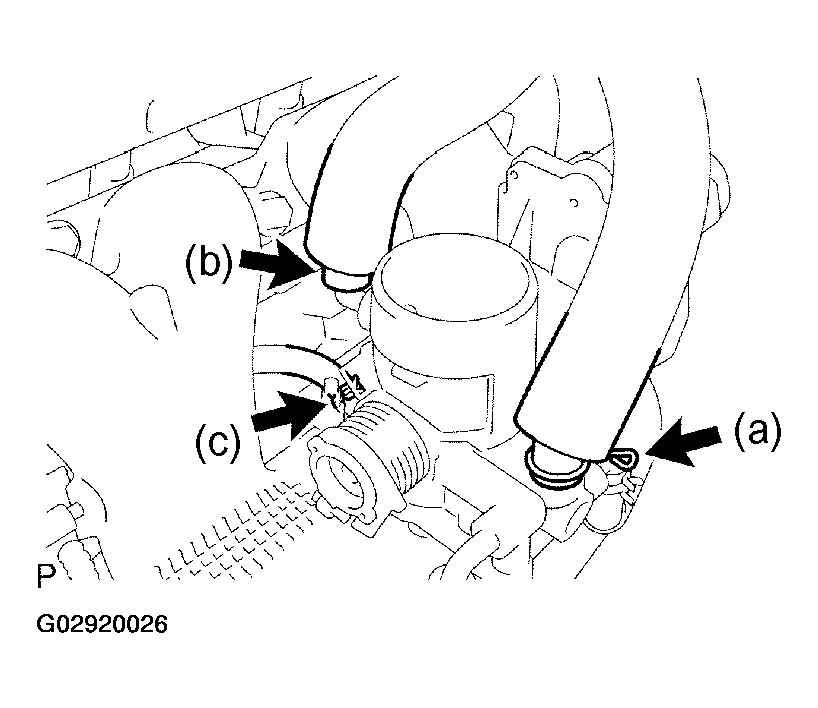
- Disconnect the ventilation hose from the throttle with motor body.
- Disconnect the ventilation hose No. 2 from the throttle with motor body.
- Disconnect the fuel vapor feed hose No. 1 from the throttle with motor body.
 Courtesy of © TOYOTA, LICENSE AGREEMENT TMS1002
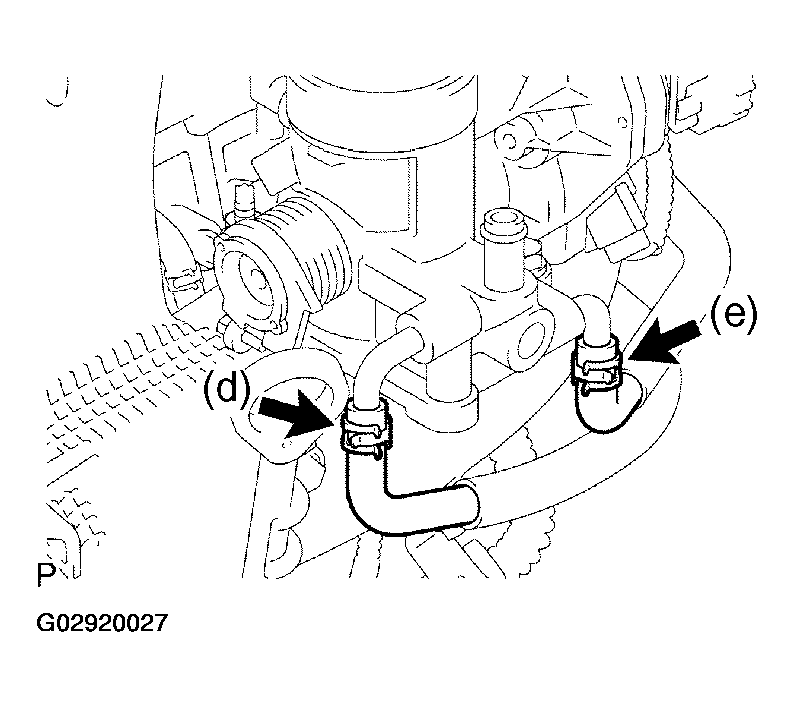
- Disconnect the water by-pass hose from the throttle with motor body.
- Disconnect the water by- pass hose No. 2 from the throttle with motor body.
 Courtesy of © TOYOTA, LICENSE AGREEMENT TMS1002
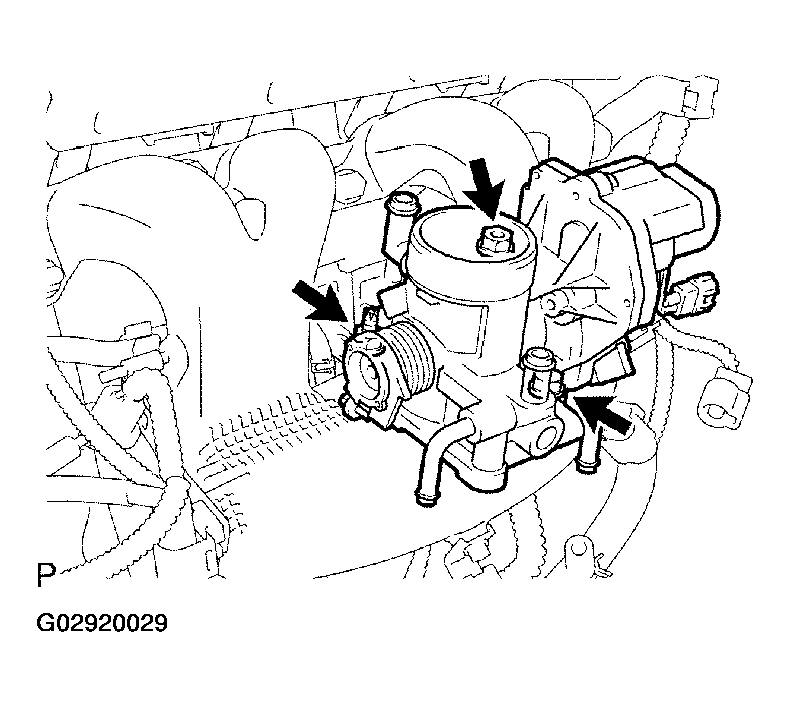
- Disconnect the throttle control motor connector.
- Disconnect the throttle position sensor connector.
 Courtesy of © TOYOTA, LICENSE AGREEMENT TMS1002
- Remove the bolt and 2 nuts, then remove the throttle w/motor body.
 Courtesy of © TOYOTA, LICENSE AGREEMENT TMS1002
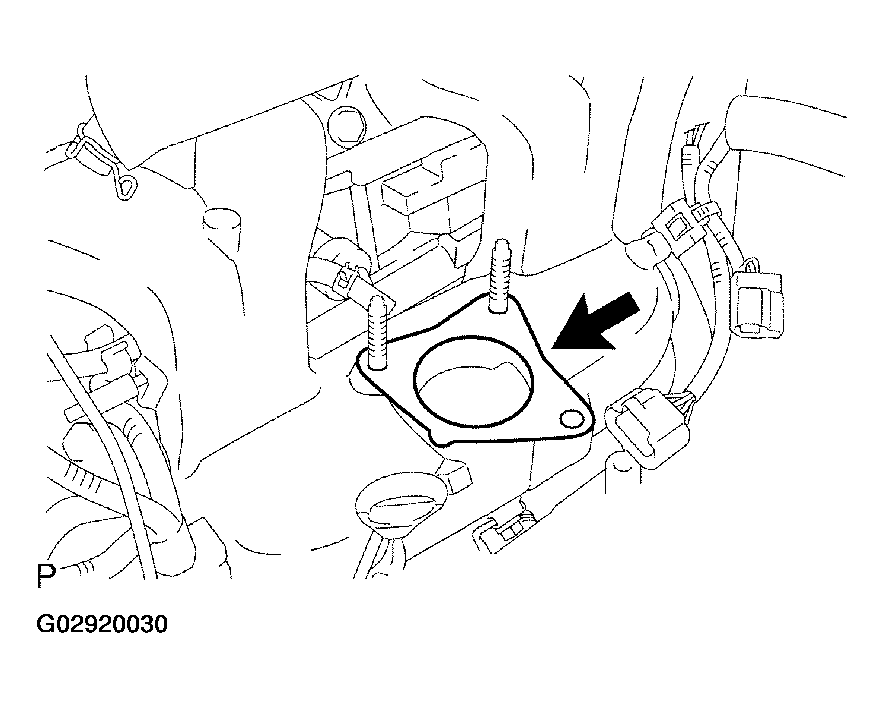
- Remove the gasket from the intake manifold.
 Courtesy of © TOYOTA, LICENSE AGREEMENT TMS1002
- INSTALL THROTTLE W/MOTOR BODY ASSY
- Install a new gasket to the intake manifold.
- Install the throttle w/ motor body with the bolt and 2 nuts.
- Torque: 20 N.m (204 kgf.cm, 15 ft.lbf)
- Connect the throttle position sensor connector.
- Connect the throttle control motor connector.
- Connect the water by-pass hose No. 2 to the throttle with motor body.
- Connect the water by-pass hose to the throttle with motor body.
- Connect the fuel vapor feed hose No. 1 to the throttle with motor body.
- Connect the ventilation hose No. 2 to the throttle with motor body.
- Connect the ventilation hose to the throttle with motor body.
- INSTALL AIR CLEANER ASSY
- Install the air cleaner with the 2 bolts.
- Torque: 7.0 N.m (71 kgf.cm, 62 in.lbf)
- Tighten the hose clamp bolt.
- Torque: 3.0 N.m (31 kgf.cm, 27 in.lbf)
- Connect the air cleaner inlet No. 1, then tighten the hose clamp bolt.
- Torque: 3.0 N.m (31 kgf.cm, 27 in.lbf)
- Connect the mass air flow meter connector.
- CONNECT ENGINE WIRE NO.3 (BATTERY NEGATIVE TERMINAL) (See REPLACEMENT
)
- ADD ENGINE COOLANT (See REPLACEMENT
)
- CHECK FOR ENGINE COOLANT LEAKS (See ON-VEHICLE INSPECTION
)
- INSTALL REAR FLOOR BOARD NO.3
- INSTALL DECK FLOOR BOX REAR
- INSTALL REAR FLOOR BOARD NO.2
- INSTALL ENGINE UNDER COVER LH
- INSTALL RADIATOR SUPPORT OPENING COVER
- POWER WINDOW CONTROL SYSTEM INITIALIZE (See INTRODUCTION
)