Brake System Indicator Test
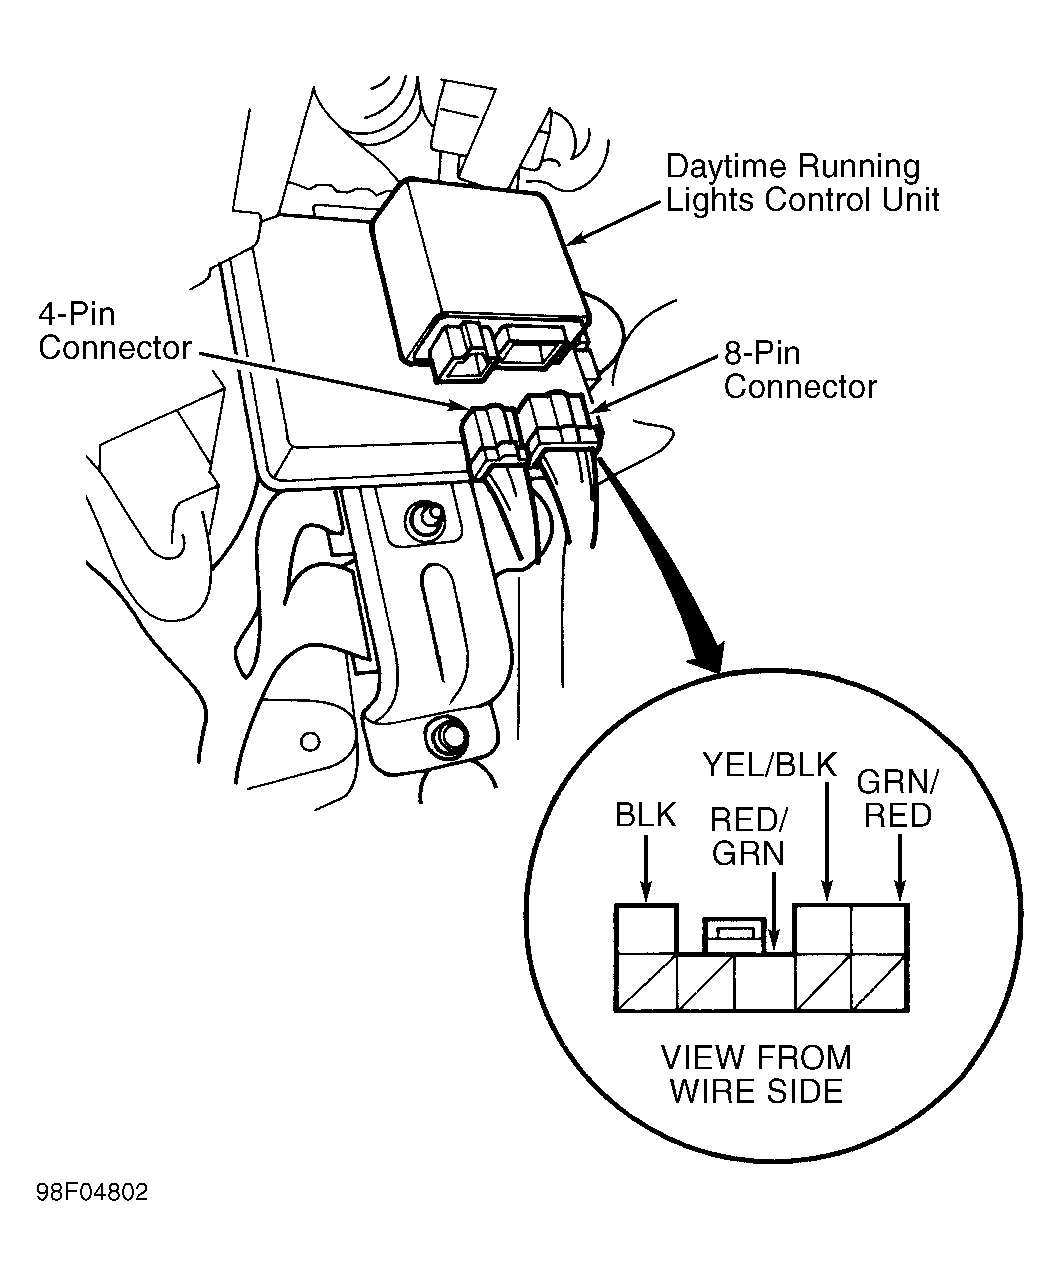
- Remove dashboard lower cover and knee bolster. Daytime Running Lights (DRL) control unit is located on driver's side of vehicle near "A" pillar. Disconnect DRL control unit 8-pin connector. Check connectors for damage or loose/corroded terminals, repair as necessary. Go to next step.
- Ensure brake fluid reservoir is full and parking brake lever is down. Turn ignition switch to ON position. Connect fused jumper between ground and DRL control unit 8-pin connector Green/Red wire. See Fig 1
. Brake system indicator light located in instrument panel should come on. If brake system indicator light does not come on, check for blown No. 25 (7.5-amp) fuse in under-dash fuse box, open in Green/Red wire between instrument panel and DRL control unit or a burned-out brake system indicator light bulb. If brake system indicator light comes on, go to next step.
- With ignition switch on, pull parking brake lever up. Use DVOM and check for continuity between ground and DRL control unit 8-pin connector Red/Green wire. If continuity is not indicated, check for open in Red/Green wire between parking brake switch and DRL control unit 8-pin connector or between parking brake switch and ground. If circuit is okay, test switch and replace as necessary. See PARKING BRAKE SWITCH TEST
. If continuity is indicated, replace DRL control unit.
 Courtesy of AMERICAN HONDA MOTOR CO., INC.