Exploded View: Reassembly
- Align the pin (A) of the subvalve (B) with the oil passage (C) in the pump housing, and push the subvalve into place, then install the snap ring (D).
 Courtesy of AMERICAN HONDA MOTOR CO., INC.
- Install the new pump seal (A) (with its grooved side facing in) into the pump housing by hand first, then position the pump driveshaft (B) in the pump housing. Press the pump driveshaft and pump seal with the appropriate size socket wrench (C) as shown.
 Courtesy of AMERICAN HONDA MOTOR CO., INC.
- Install the 40 mm snap ring (D) with its radiused edge facing out.
- Coat the new pump cover seal (A) with power steering fluid, and install it into the groove in the pump cover (B).
 Courtesy of AMERICAN HONDA MOTOR CO., INC.
- Install the outer side plate (C) over the two roll pins (D) with its arrow marks stamped (E) facing down.
- Set the pump cam ring (A) over the two roll pins with its "BULLET" mark (B) facing down.
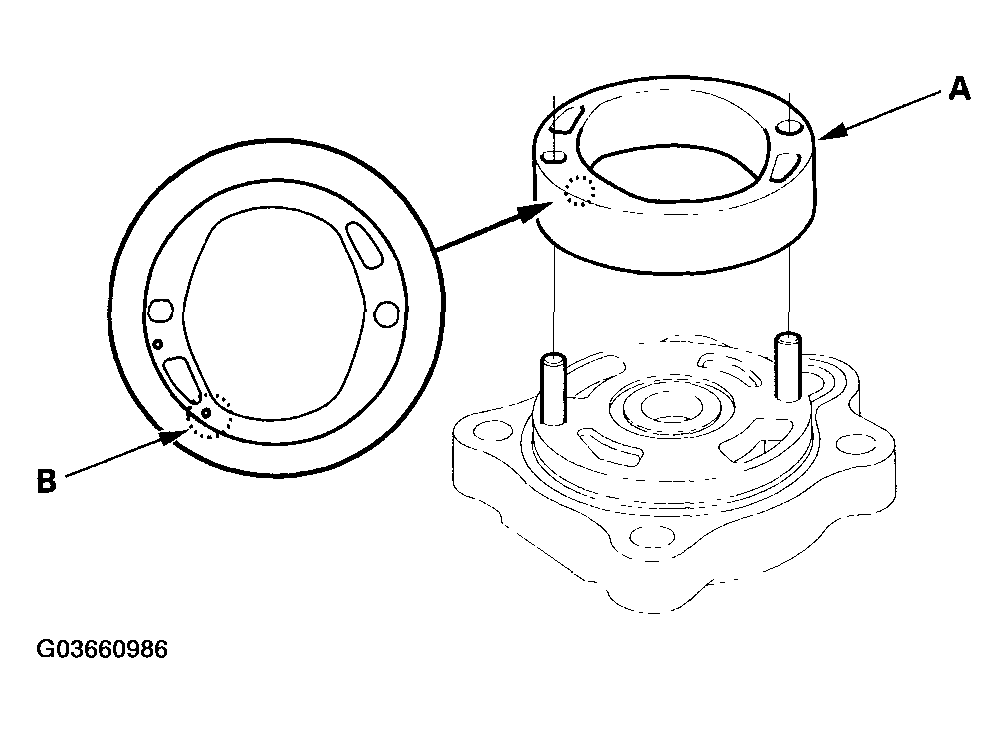 Courtesy of AMERICAN HONDA MOTOR CO., INC.
- Assemble pump rotor (A) to the pump cover (B) with its "BULLET" mark (C) facing up.
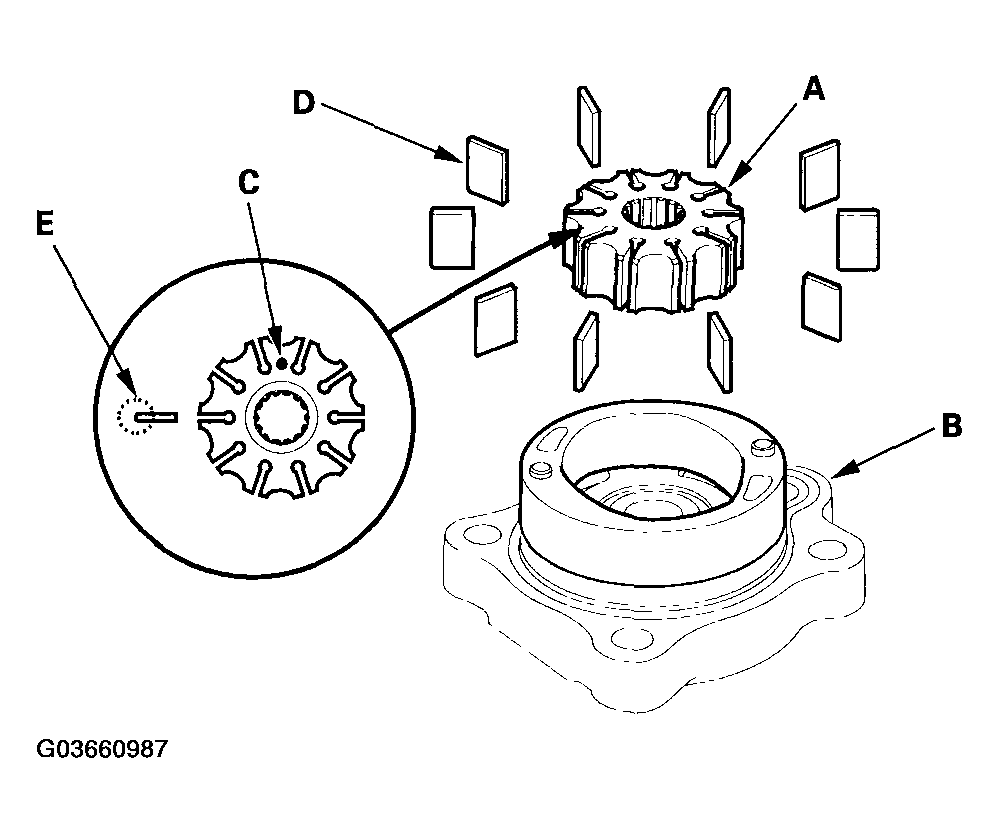 Courtesy of AMERICAN HONDA MOTOR CO., INC.
- Set the 10 vanes (D) in the grooves in the rotor. Make sure that the round ends (E) of the vanes are in contact with the sliding surface of the cam ring.
- Coat the new 15.2 mm O-ring (A) with power steering fluid, and install it into the groove in the side plate (B).
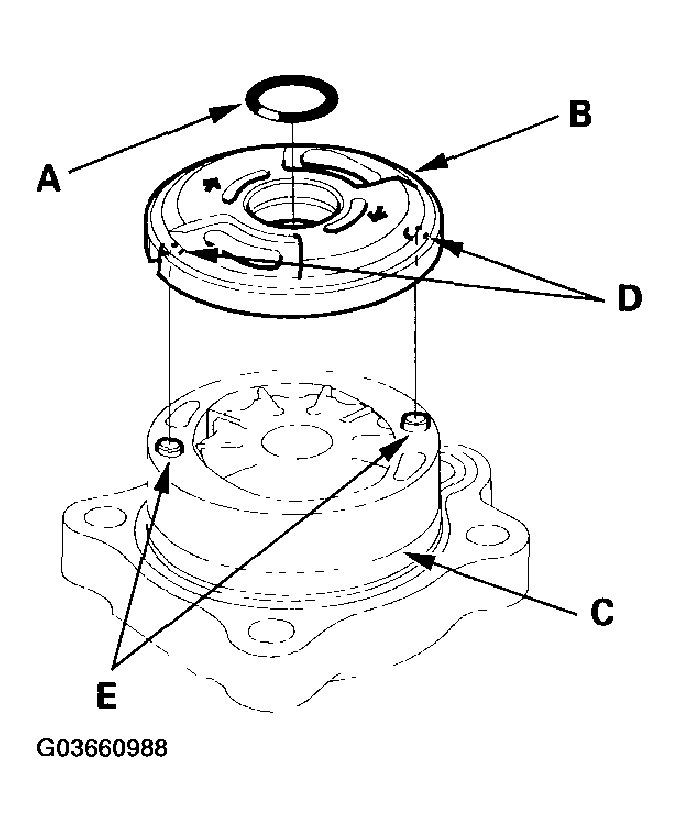 Courtesy of AMERICAN HONDA MOTOR CO., INC.
- Install the side plate on the cam ring (C) by aligning the roll pin set holes (D) in the side plate with the roll pins (E).
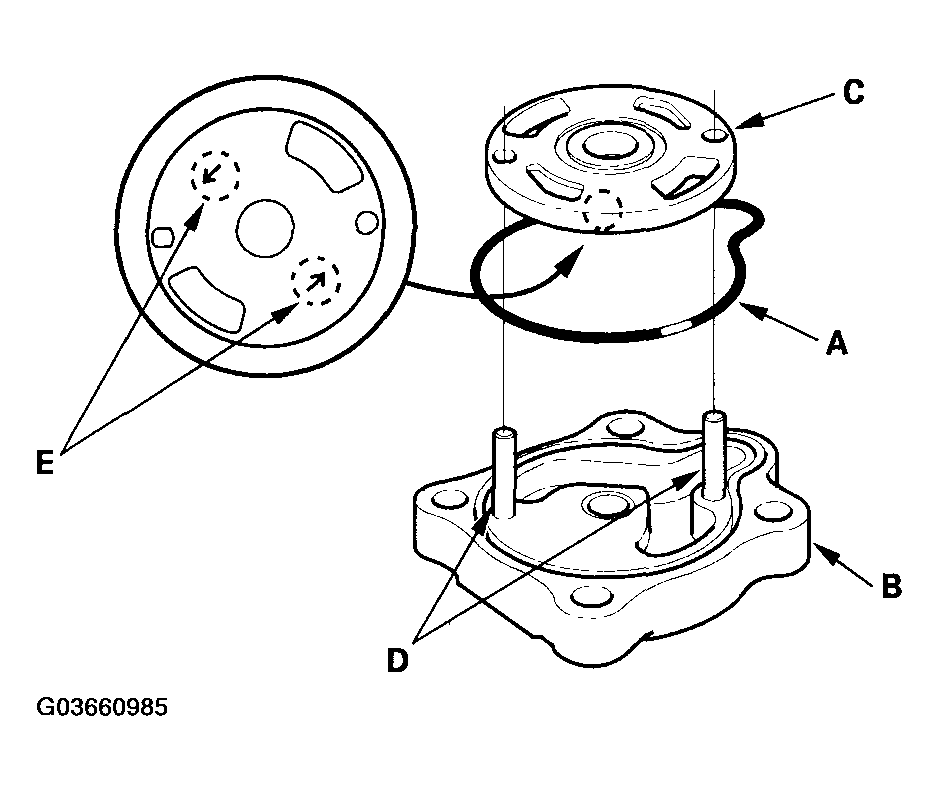
- Coat the new 51 mm O-ring (A) with power steering fluid, and position it in the bottom of the pump housing.
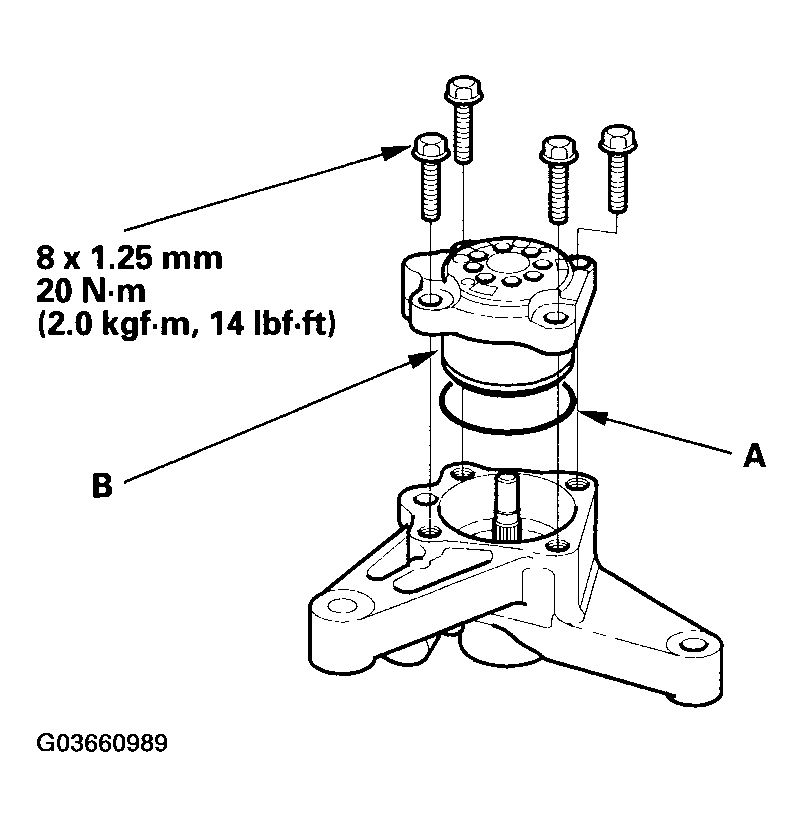 Courtesy of AMERICAN HONDA MOTOR CO., INC.
- Install the pump cover assembly (B) in the pump housing. Tighten the bolts to the specified torque.
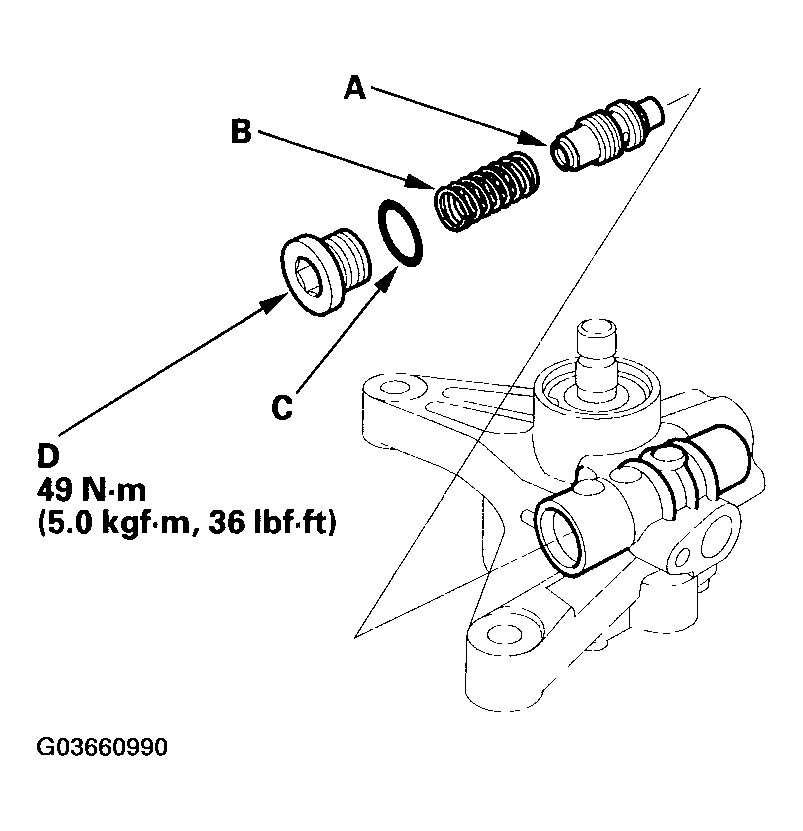
- Coat the flow control valve (A) with power steering fluid, then install it and the spring (B) in the pump housing.
 Courtesy of AMERICAN HONDA MOTOR CO., INC.
- Coat the new 16.7 mm O-ring (C) with power steering fluid, and install it on the flow control valve cap (D), then install the cap on the pump housing, and tighten it to the specified torque.
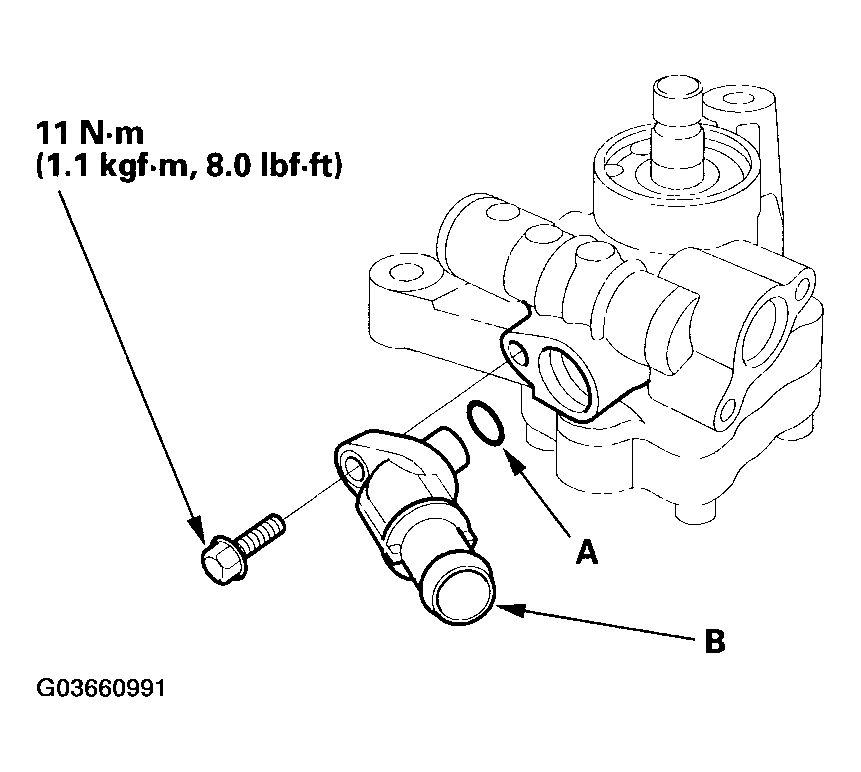
- Coat the new 13 mm O-ring (A) with power steering fluid, and install it on the inlet joint (B). Install the inlet joint on the pump housing.
 Courtesy of AMERICAN HONDA MOTOR CO., INC.
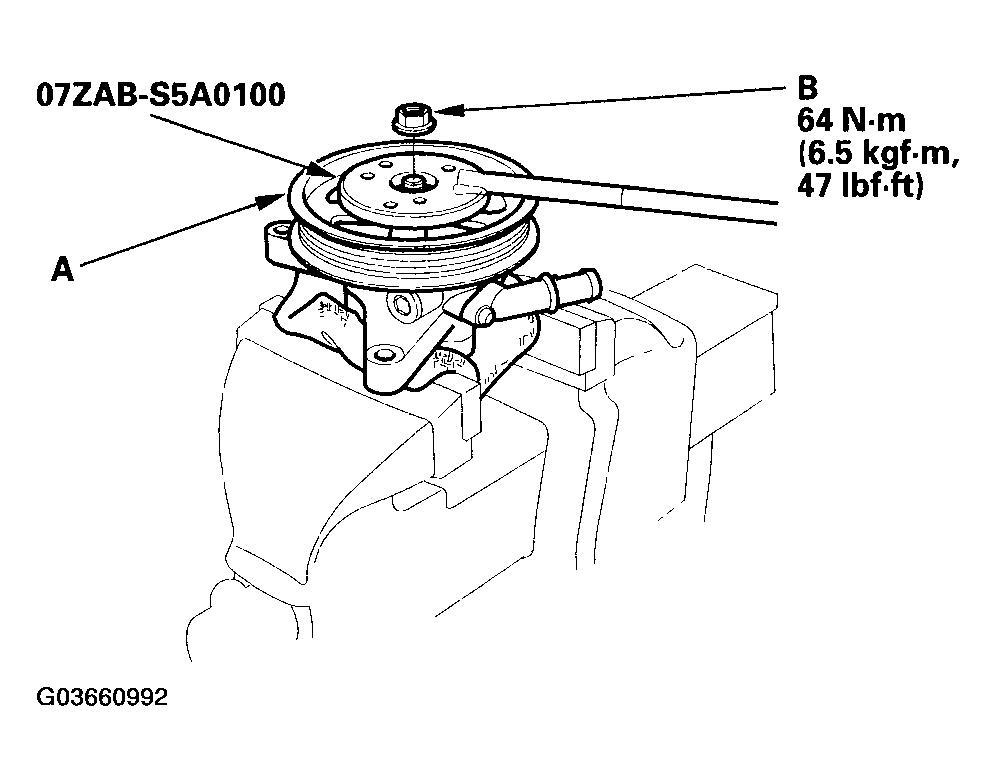
- Install the pulley (A), then loosely install the pulley nut (B). Hold the steering pump in a vise with soft jaws. Be careful not to damage the pump housing with the jaws of the vise.
 Courtesy of AMERICAN HONDA MOTOR CO., INC.
- Hold the pulley with the special tool, and tighten the pulley nut to the specified torque.
- Check that the pump turns smoothly by turning the pulley by hand. If it turns hard, loosen the four flange bolts on the cover, then retighten them in same manner as in step 12. Turn the pump again by hand.