Headlight Switch
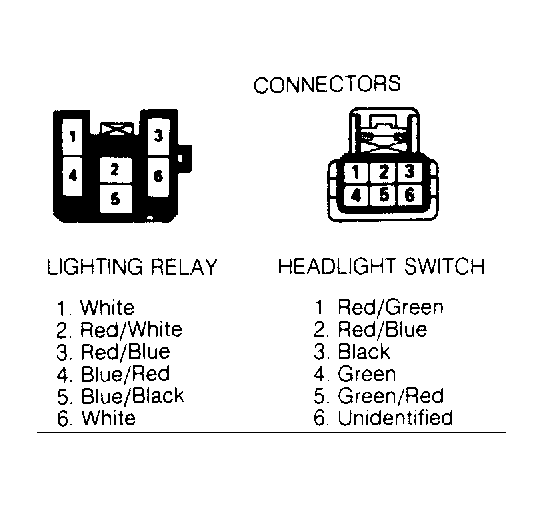
- Push headlight switch on and turn combination switch to low beam position. If headlights do not operate, remove lighting relay from fuse/relay box on left side of engine compartment. Using test light, ensure voltage is present at terminals No. 1, 3, 4 and 6 (White, Red/Blue, Blue/Red and White wires) of lighting relay/fuse box connector. See Fig 1
. If voltage does not exist, check main fusible link FL-2 and fuse E-5. Fusible links and fuse E-5 are located in relay/fuse box on left fender panel. If voltage exists, go to next step.
 Courtesy of GENERAL MOTORS CORP.
- Using ohmmeter, backprobe terminal No. 3 (Red/Blue wire) of lighting relay/fuse box connector and connect other lead to ground. If continuity exists through headlight switch to ground, replace lighting relay. If continuity does not exist, backprobe headlight switch harness connector terminal No. 2 (Red/Blue wire) with test light. See Fig 1
. Headlight switch harness connector is located behind left side of meter hood. See INSTRUMENT CLUSTER
.
- If test light does light and headlights turn on, Red/Blue wiring circuit is good. If test light does not light, repair open in Red/Blue wiring circuit. Using ohmmeter, backprobe headlight switch harness connector terminal No. 3 (Black wire) and ground. If continuity is present, headlight switch ground circuit is good. Replace faulty headlight switch.