Headlight Switch: Storm
- Push headlight switch on and turn combination switch to low beam position. If headlights do not operate, remove lighting relay from fuse/relay box on left side of engine compartment.
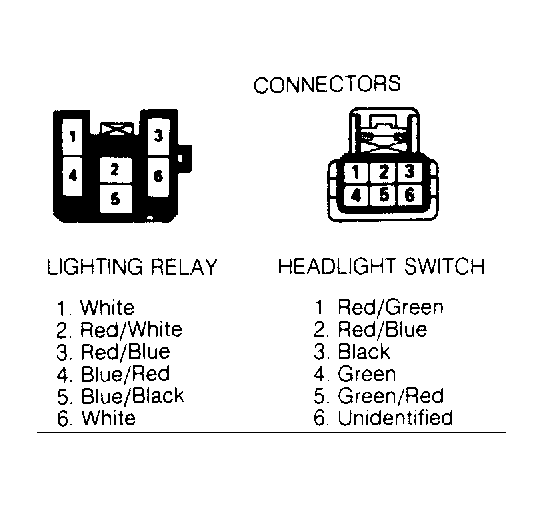
- Using test light, ensure voltage exists at terminals No. 1, 3, 4 and 6 (White, Red/Blue, Blue/Red and White wires) of lighting relay/fuse box connector. See Fig 1
.
- If voltage does not exist, check main fusible link FL-2 and fuse E-5. Fusible links and fuse E-5 are located in fuse/relay box on left fender panel. If voltage exists, go to next step.
- Using ohmmeter connected to ground, backprobe terminal No. 3 (Red/Blue wire) of lighting relay/fuse box connector. If continuity exists through headlight switch to ground, replace lighting relay.
- If continuity does not exist, backprobe headlight switch harness connector terminal No. 2 (Red/Blue wire) with test light. See Fig 1
. Headlight switch harness connector is located behind left side of meter hood. See INSTRUMENT CLUSTER
under REMOVAL & INSTALLATION.
- If test light glows and headlights turn on, Red/Blue wiring circuit is good. If test light does not glow, repair open in Red/Blue wiring circuit. Using ohmmeter connected to ground, backprobe headlight switch harness connector terminal No. 3 (Black wire). If continuity is present, headlight switch ground circuit is good. Replace faulty headlight switch.
 Courtesy of GENERAL MOTORS CORP.