Body Control Module (BCM) System Test: Testing
- Close all doors. Turn ignition switch to OFF position. Remove MALL PGM fuse (10-amp) from instrument panel fuse block. Turn ignition switch to ACC position. BCM will enter feature customization mode. This will cause seat belt indicator light to flash and chime to sound to indicate type of BCM (2, 3 or 4). If BCM is identified, go to next step. If BCM is not identified, go to step 4
- If type of BCM identified in previous step matches vehicle equipment options available for that vehicle, go to next step. If type of BCM identified in previous step does not match vehicle equipment options available for that vehicle, go to step 7
.
- Turn ignition switch from ACC position to OFF position, then back to ACC position within one second. BCM will enter diagnostic mode, and will cause seat belt indicator light to flash and chime to sound to indicate any stored BCM Diagnostic Trouble Codes (DTC). See BCM DTC DEFINITIONS
table under SELF-DIAGNOSTIC SYSTEM. If any DTCs are stored, go to appropriate DTC test under DIAGNOSTIC TESTS
. If no DTCs are stored, system is okay.
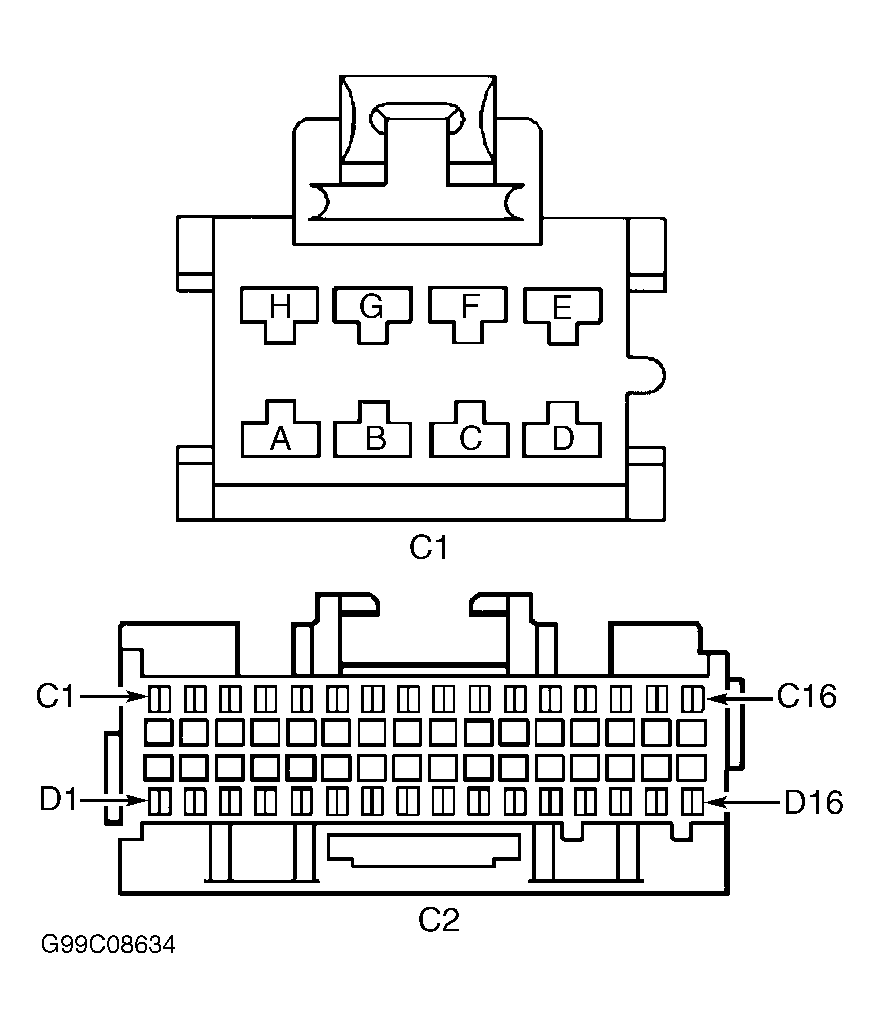
- Turn ignition switch to OFF position. Disconnect BCM connector C1. Connect test light between BCM harness connector C2 terminal "D" (Black wire) and battery. See Fig 1
. If test light comes on, go to next step. If test light does not come on, go to step 8
.
 Courtesy of GENERAL MOTORS CORP.
- Turn ignition switch to ON position. Connect test light between BCM harness connector C2 terminal D4 (Yellow wire) and ground. If test light comes on, leave test light connected, and go to next step. If test light does not come on, go to step 9
.
- Turn ignition switch to OFF position. If test light does not come on, go to step 11
. If test light comes on, go to step 10
.
- Replace BCM with appropriate BCM type. See BODY CONTROL MODULE (BCM)
under REMOVAL & INSTALLATION. After repairs, return to step 1
.
- Repair poor connection or open in Black wire between BCM and ground. After repairs, return to step 1
.
- Repair poor connection or open in Yellow wire between BCM and instrument panel fuse block. After repairs, return to step 1
.
- Repair short to voltage in Yellow wire between BCM and instrument panel fuse block. After repairs, return to step 1
.
- Check for poor connections at BCM connectors. Repair as necessary. After repairs, return to step 1
. If connections are okay, replace BCM. See BODY CONTROL MODULE (BCM)
under REMOVAL & INSTALLATION. After replacement, return to step 1
.