Rear Console Box: Disassembly
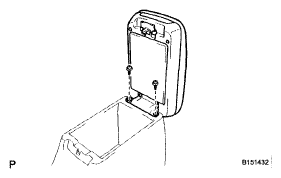
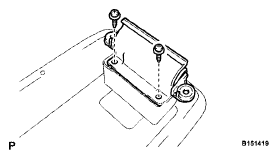
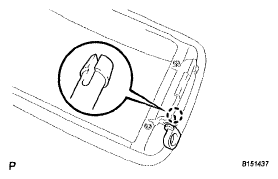
- REMOVE CONSOLE COMPARTMENT DOOR SUB-ASSEMBLY (w/ Sliding Roof)
- Remove the 2 screws.
 Courtesy of © TOYOTA, LICENSE AGREEMENT TMS1002
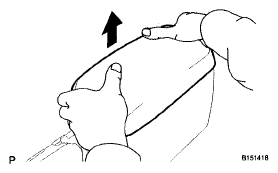
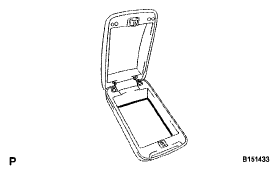
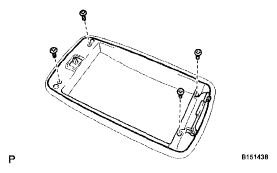
- Remove the console compartment door sub-assembly as shown in the illustration.
 Courtesy of © TOYOTA, LICENSE AGREEMENT TMS1002
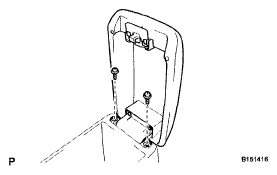
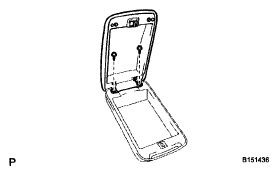
- REMOVE CONSOLE COMPARTMENT DOOR SUB-ASSEMBLY (w/ Roof Window Glass)
- Remove the 2 screws.
 Courtesy of © TOYOTA, LICENSE AGREEMENT TMS1002
- Remove the console compartment door sub-assembly as shown in the illustration.
 Courtesy of © TOYOTA, LICENSE AGREEMENT TMS1002
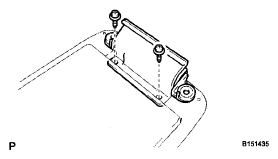
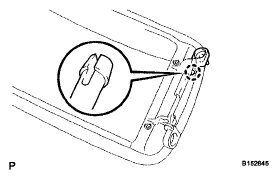
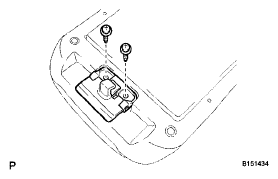
- REMOVE CONSOLE COMPARTMENT DOOR HINGE SUB-ASSEMBLY (w/ Sliding Roof)
- Remove the 2 screws and the console compartment door hinge sub-assembly.
 Courtesy of © TOYOTA, LICENSE AGREEMENT TMS1002
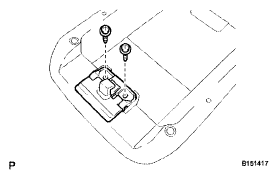
- REMOVE CONSOLE COMPARTMENT DOOR HINGE SUB-ASSEMBLY (w/ Roof Window Glass)
- Remove the 2 screws and the console compartment door hinge sub-assembly.
 Courtesy of © TOYOTA, LICENSE AGREEMENT TMS1002
- REMOVE BOX BOTTOM MAT (w/ Sliding Roof)
- Remove the box bottom mat.
 Courtesy of © TOYOTA, LICENSE AGREEMENT TMS1002
- REMOVE OUTER CONSOLE COMPARTMENT DOOR (w/ Sliding Roof)
- Remove the 2 screws and outer console compartment door.
 Courtesy of © TOYOTA, LICENSE AGREEMENT TMS1002
- REMOVE NO. 1 CONSOLE COMPARTMENT DOOR STOPPER (w/ Sliding Roof)
- Disengage the claw and remove the No. 1 console compartment door stopper.
 Courtesy of © TOYOTA, LICENSE AGREEMENT TMS1002
- REMOVE NO. 2 CONSOLE COMPARTMENT DOOR STOPPER (w/ Sliding Roof)
- Disengage the claw and remove the No. 2 console compartment door stopper.
 Courtesy of © TOYOTA, LICENSE AGREEMENT TMS1002
- REMOVE INNER CONSOLE COMPARTMENT DOOR (w/ Sliding Roof)
- Remove the 4 screws and inner console compartment door.
 Courtesy of © TOYOTA, LICENSE AGREEMENT TMS1002
- REMOVE CONSOLE COMPARTMENT DOOR LOCK PIN (w/ Sliding Roof)
- REMOVE CONSOLE COMPARTMENT DOOR LOCK BASE (w/ Sliding Roof)
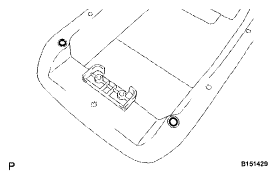
- REMOVE CONSOLE COMPARTMENT DOOR LOCK SUB-ASSEMBLY (w/ Sliding Roof)
- Remove the 2 screws and remove the console compartment door lock sub-assembly.
 Courtesy of © TOYOTA, LICENSE AGREEMENT TMS1002
- REMOVE CONSOLE COMPARTMENT DOOR LOCK SUB-ASSEMBLY (w/ Roof Window Glass)
- Remove the 2 screws and remove the console compartment door lock sub-assembly.
 Courtesy of © TOYOTA, LICENSE AGREEMENT TMS1002
- REMOVE CONSOLE COMPARTMENT DOOR CUSHION (w/ Roof Window Glass)
- Remove the 2 console compartment door cushions.
 Courtesy of © TOYOTA, LICENSE AGREEMENT TMS1002
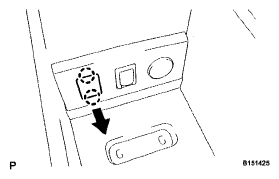
- REMOVE SPARE SWITCH HOLE COVER
- Disengage the 2 claws and remove the spare switch hole cover.
 Courtesy of © TOYOTA, LICENSE AGREEMENT TMS1002
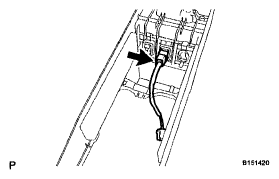
- REMOVE CONSOLE BOX WIRE
- Disconnect the connector and remove the console box wire.
 Courtesy of © TOYOTA, LICENSE AGREEMENT TMS1002
- REMOVE STEREO JACK ADAPTER ASSEMBLY
- Remove the 2 claws and stereo jack adapter assembly.
 Courtesy of © TOYOTA, LICENSE AGREEMENT TMS1002
- REMOVE POWER POINT SOCKET ASSEMBLY (w/ Sliding Roof) (See
REMOVAL
)
- REMOVE POWER OUTLET SOCKET COVER (w/ Sliding Roof)
- Disengage the 2 claws and remove the power outlet socket cover.