Ignition Timing: AERIO
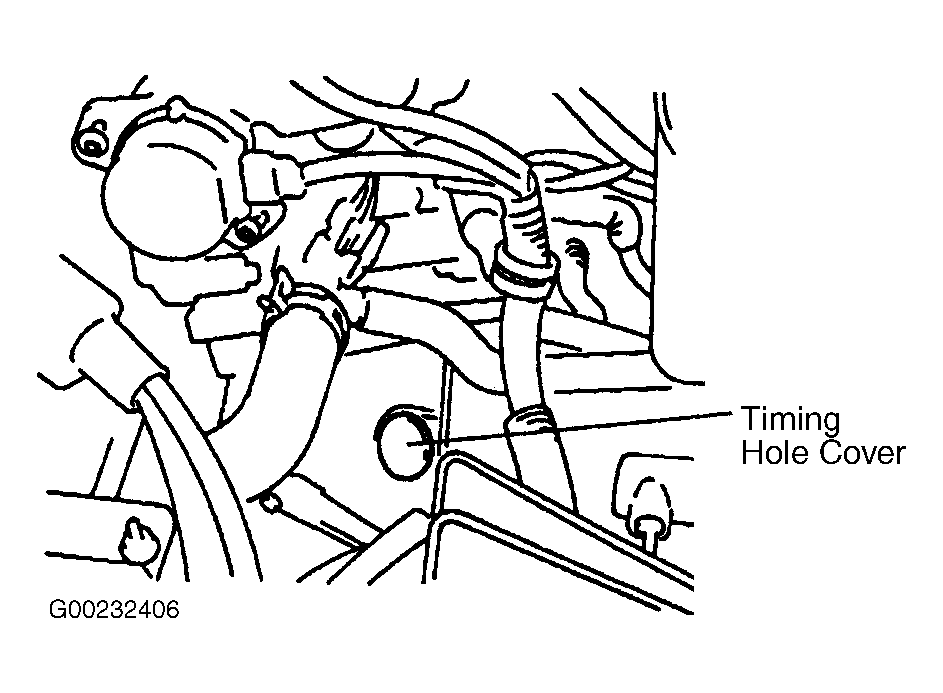
- Turn ignition switch to LOCK position. Ensure transmission is in Neutral or Park. Set parking brake. Remove timing hole cover, located on transaxle bell housing. See Fig 1
.
- Connect Suzuki scan tool to Data Link Connector (DLC), located under left side of instrument panel. See Fig 2
. Start engine and allow it to reach normal operating temperature. Turn all accessories off. Ensure idle speed is correct. See IDLE SPEED
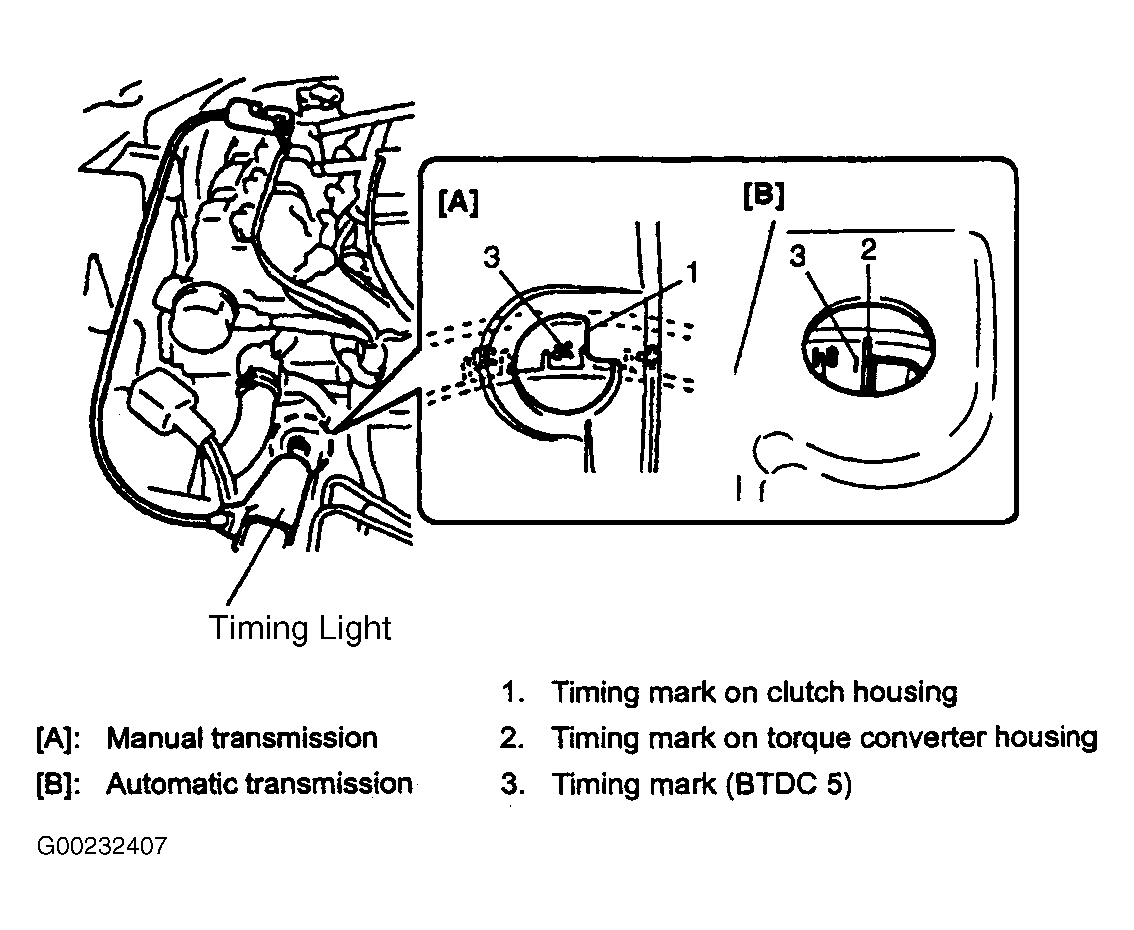
under IDLE SPEED & MIXTURE. On scan tool, select MISC mode and fix ignition timing by selecting FIXED SPARK mode. Set timing light to No. 1 ignition coil harness. Aim timing light at timing mark and check ignition timing. See Fig 3
. Ignition timing should be 4-6 degrees BTDC (at idle speed). If timing is not as specified, go to next step.
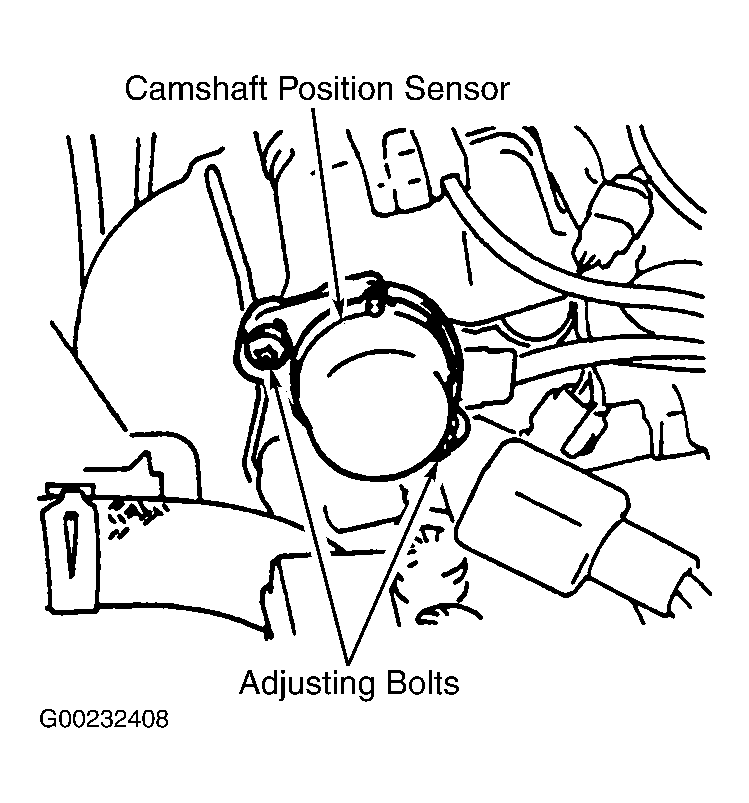
- Loosen Camshaft Position (CMP) sensor bolts and turn CMP sensor until timing marks line up. See Fig 4
. With engine idling, end FIXED SPARK MODE. Use timing light to verify that ignition timing varies more or less of initial ignition timing (about 8 degrees), indicating proper operation of electronic timing system. Also, check that timing advances when increasing engine speed. If results are not as specified, check the following for proper operation:
- Throttle Position Sensor (TPS). See THROTTLE POSITION SENSOR
under ENGINE SENSORS & SWITCHES in SYSTEM & COMPONENT TESTING article.
- Test Switch Signal Circuit. See ENGINE PERFORMANCE in SYSTEM WIRING DIAGRAMS article in ELECTRICAL.
- Engine Control Module (ECM). See ENGINE CONTROL MODULE
under ENGINE SENSORS & SWITCHES in SYSTEM & COMPONENT TESTING article.
If problem is found, repair or replace as necessary. After repair, retest system for normal operation.
 Courtesy of SUZUKI OF AMERICA CORP.
 Courtesy of SUZUKI OF AMERICA CORP.
 Courtesy of SUZUKI OF AMERICA CORP.
 Courtesy of SUZUKI OF AMERICA CORP.