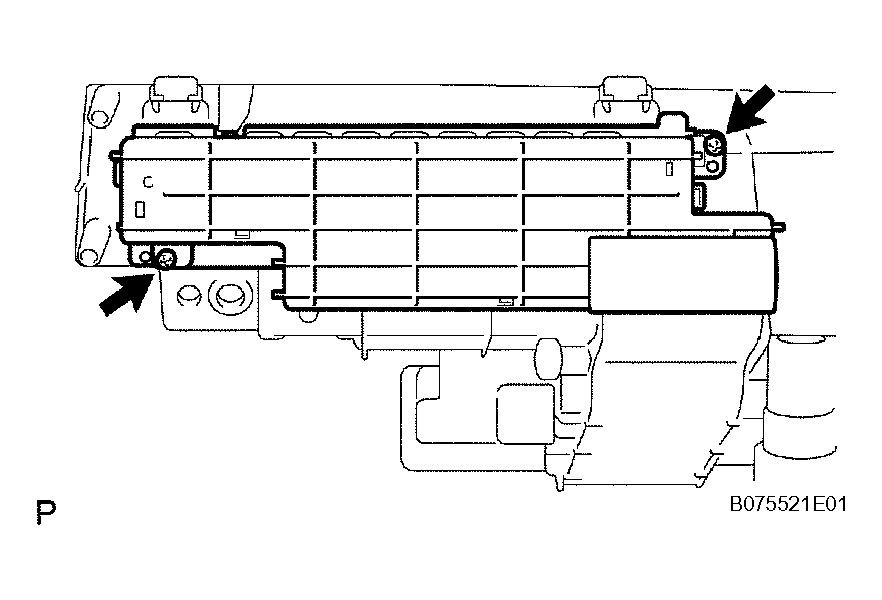
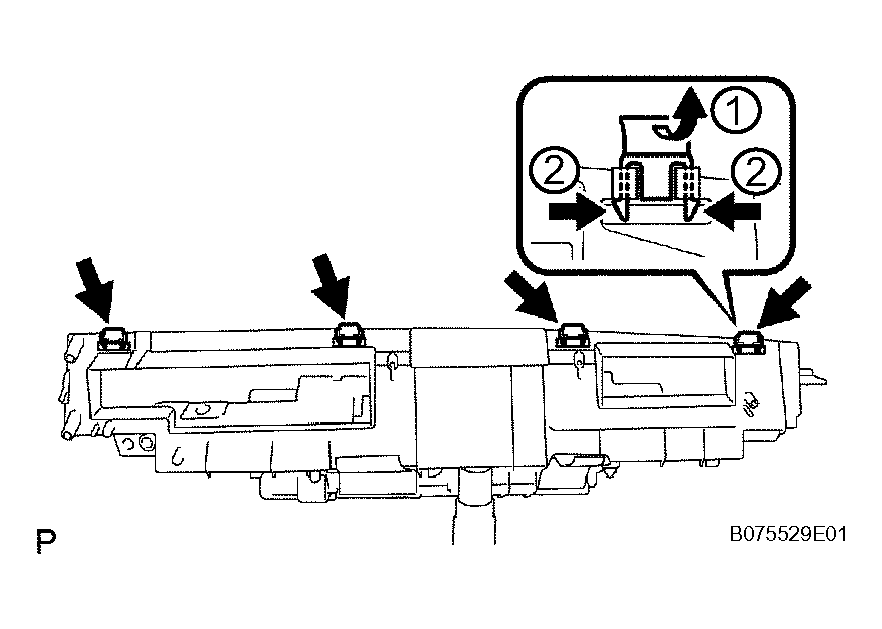
- REMOVE NO. 1 COMBINATION METER COVER
- Remove the 2 screws.
 Courtesy of © TOYOTA, LICENSE AGREEMENT TMS1002
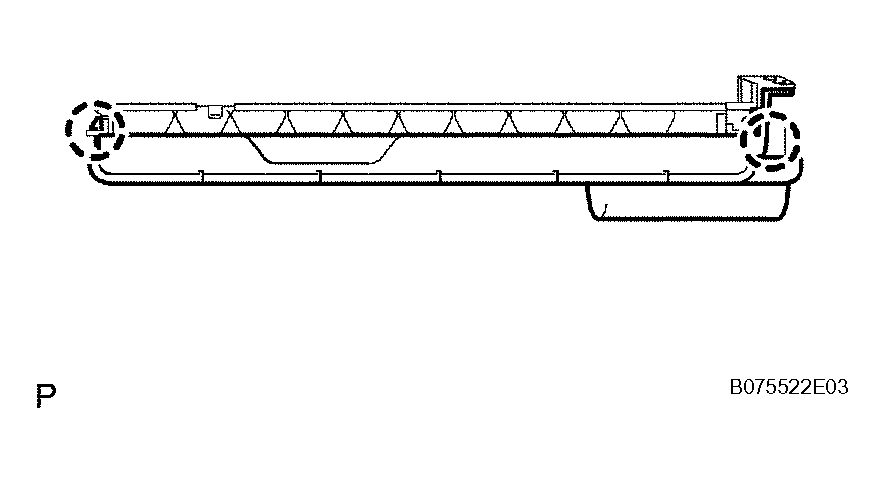
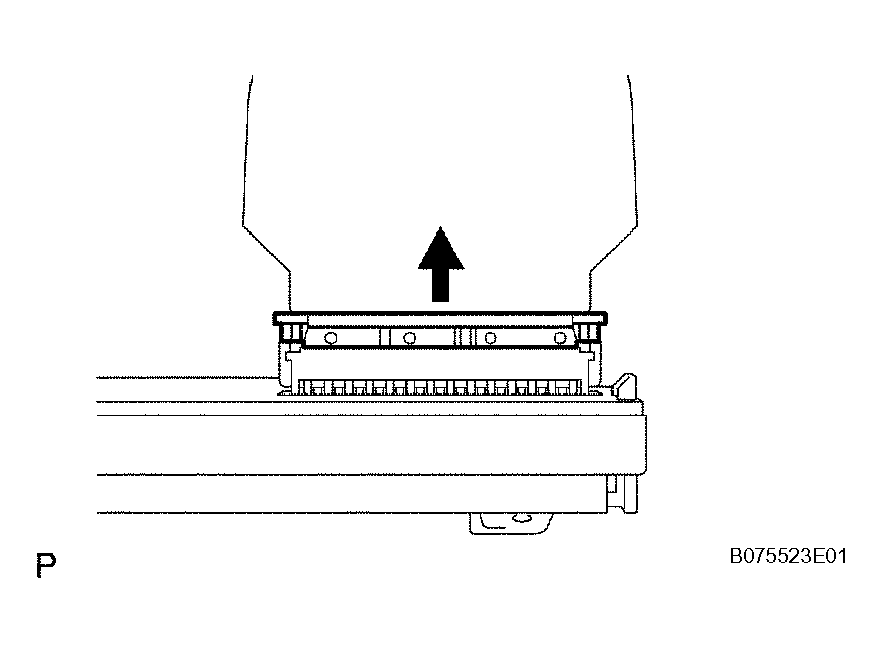
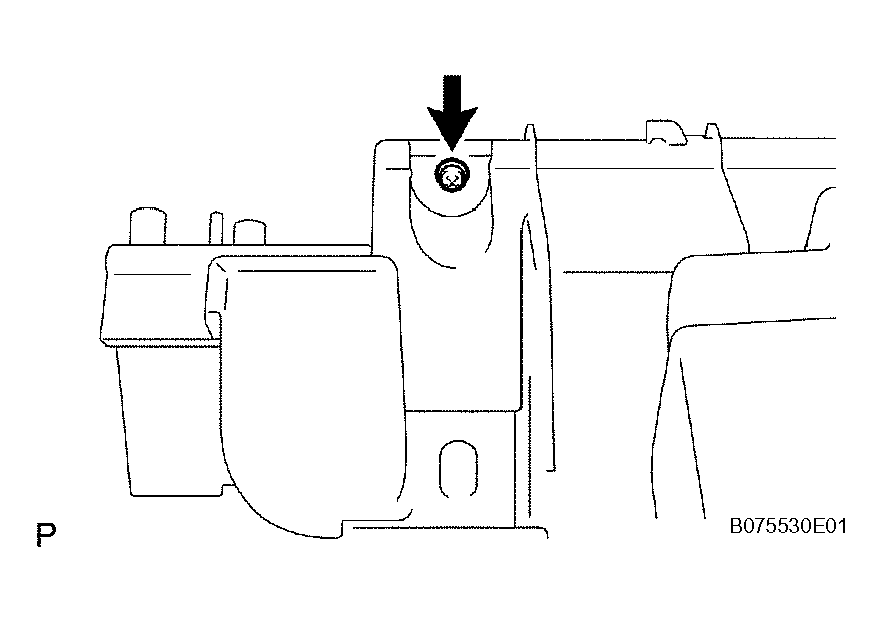
- Detach the 2 claws, and then remove the combination meter cover.
 Courtesy of © TOYOTA, LICENSE AGREEMENT TMS1002
- REMOVE METER CIRCUIT PLATE
NOTE:
When disassembling the combination meter assembly, eliminate static electricity by touching the vehicle body to prevent the components from being damaged.
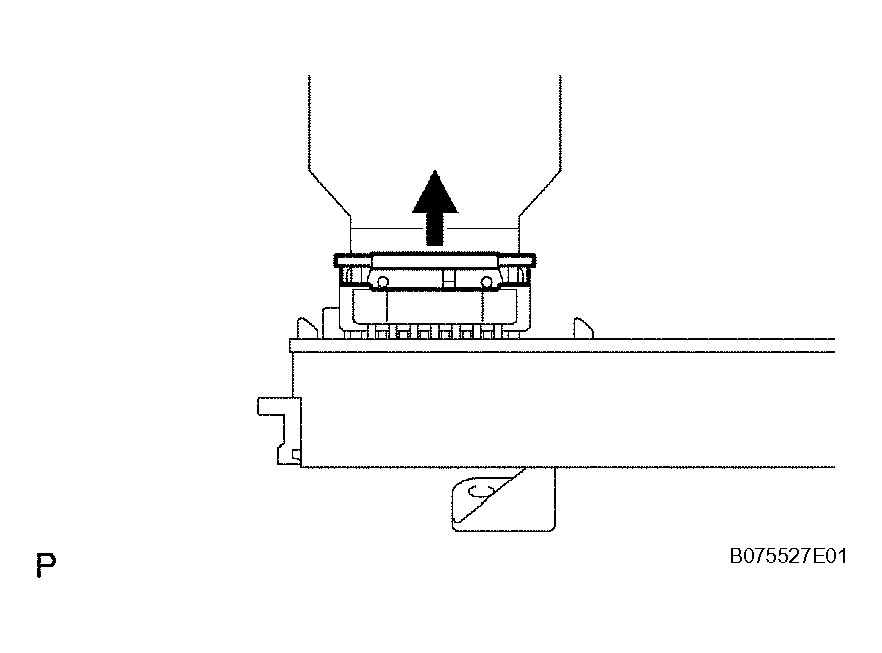
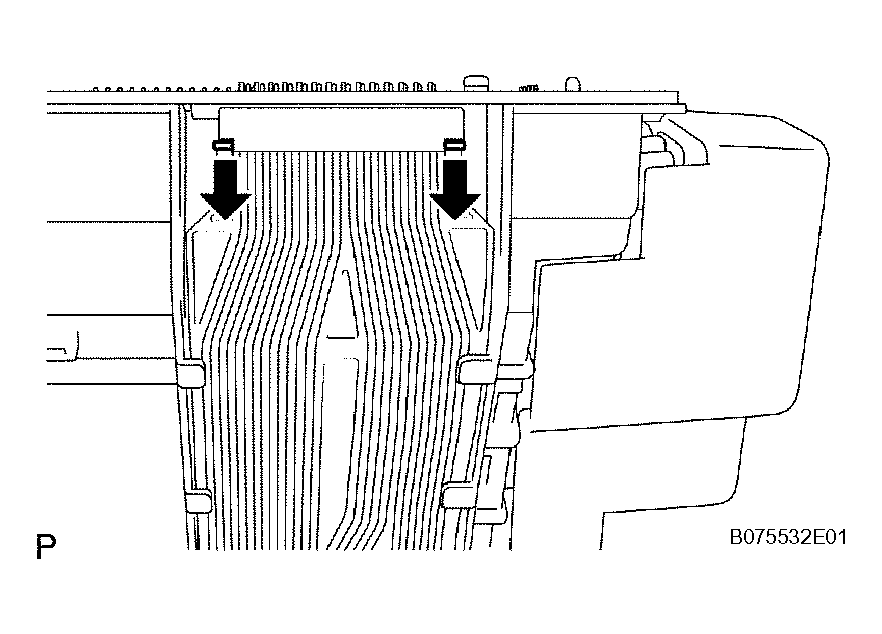
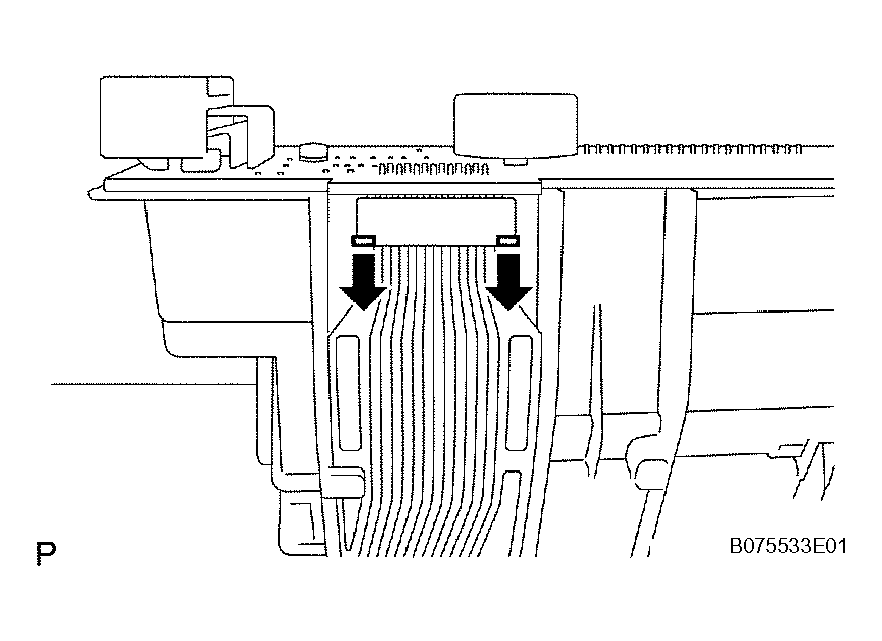
- Pull the connector lock in the direction indicated by the arrow in Fig 3 and separate the No. 3 meter circuit plate from the meter circuit plate.
 Courtesy of © TOYOTA, LICENSE AGREEMENT TMS1002
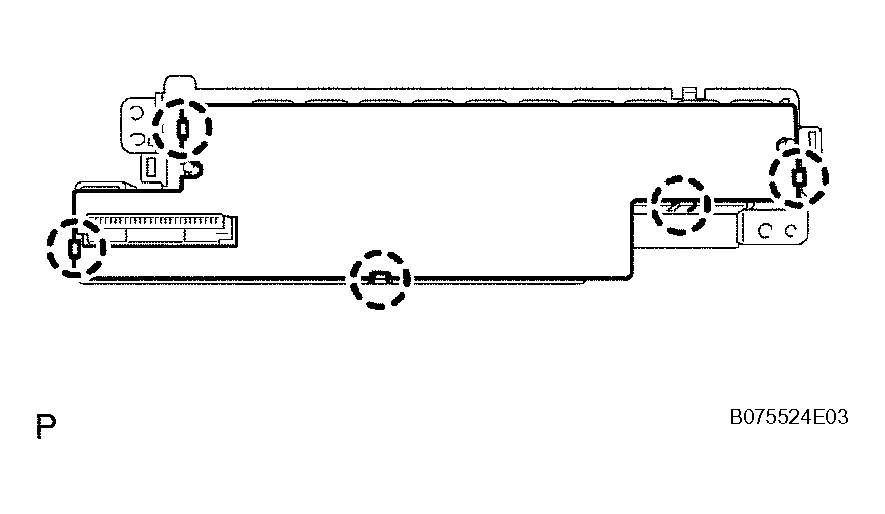
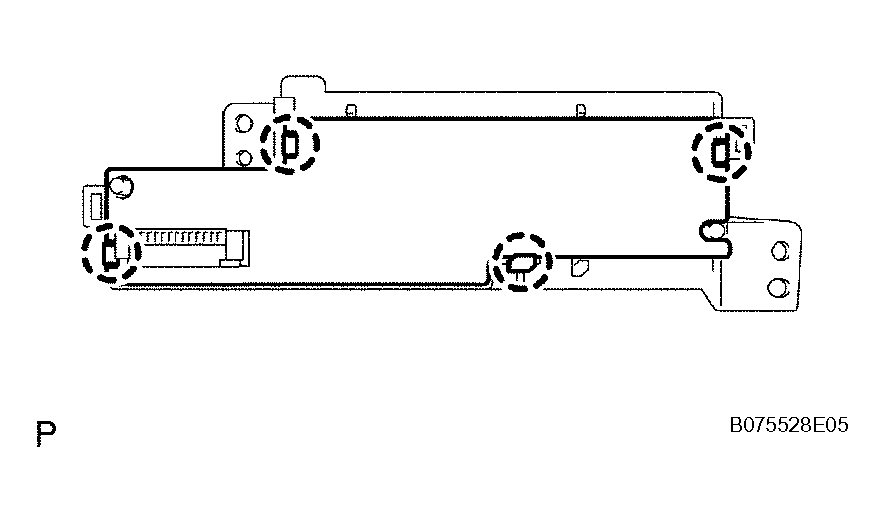
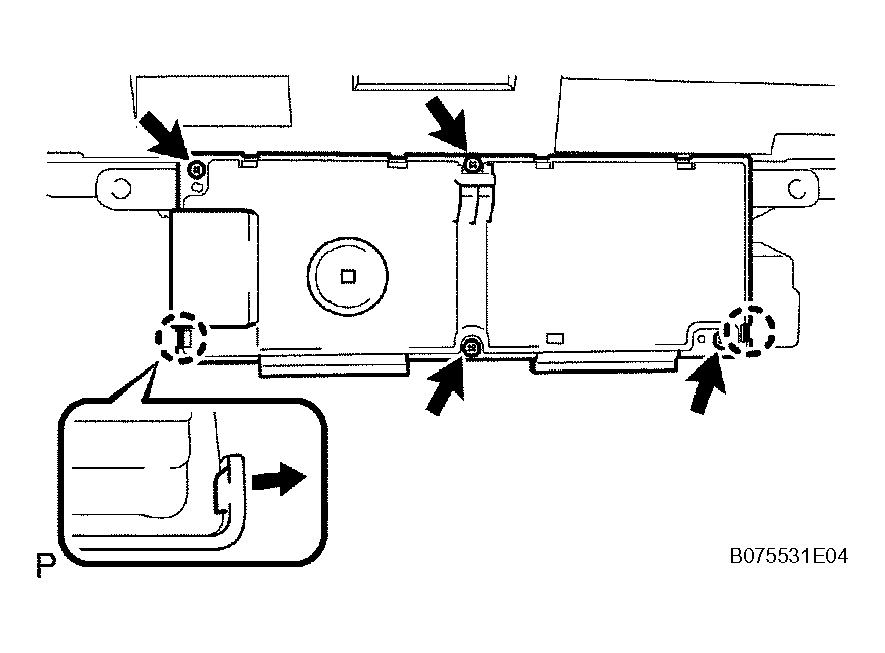
- Detach the 5 claws, and then remove the meter circuit plate.
 Courtesy of © TOYOTA, LICENSE AGREEMENT TMS1002
- REMOVE NO. 2 COMBINATION METER CASE
- REMOVE NO. 2 COMBINATION METER COVER
NOTE:
When disassembling the combination meter assembly, eliminate static electricity by touching the vehicle body to prevent the components from being damaged.
- Remove the 2 screws.
 Courtesy of © TOYOTA, LICENSE AGREEMENT TMS1002
- Detach the 2 claws, and then remove the combination meter cover.
 Courtesy of © TOYOTA, LICENSE AGREEMENT TMS1002
- REMOVE NO. 2 METER CIRCUIT PLATE
NOTE:
When disassembling the combination meter assembly, eliminate static electricity by touching the vehicle body to prevent the components from being damaged.
- Pull the connector lock in the direction indicated by the arrow in Fig 7 and separate the No. 4 meter circuit plate from the No. 2 meter circuit plate.
 Courtesy of © TOYOTA, LICENSE AGREEMENT TMS1002
- Detach the 4 claws, and then remove the meter circuit plate.
 Courtesy of © TOYOTA, LICENSE AGREEMENT TMS1002
- REMOVE NO. 3 COMBINATION METER CASE
- REMOVE NO. 1 COMBINATION METER REFLECTOR
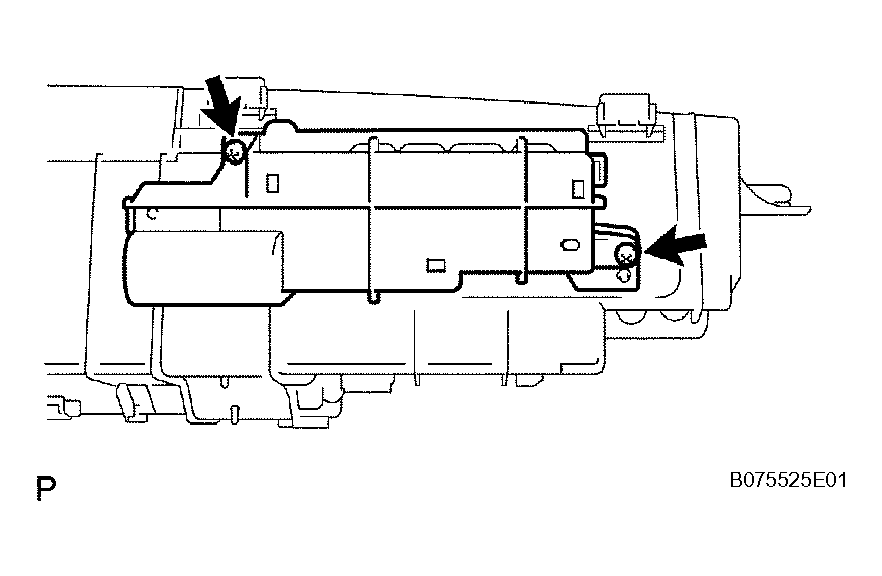
- Remove the 4 clips.
 Courtesy of © TOYOTA, LICENSE AGREEMENT TMS1002
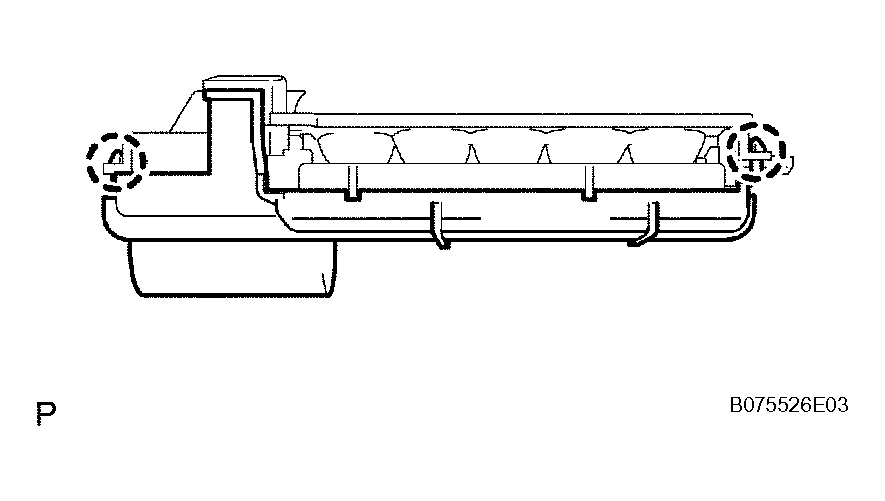
- Remove the screw and combination meter reflector.
 Courtesy of © TOYOTA, LICENSE AGREEMENT TMS1002
- REMOVE NO. 3 COMBINATION METER COVER
- Remove the 4 screws.
- Release the 2 claws of the cover, as shown in Fig 11.
- Raise the cover from the bottom and remove the combination meter cover.
 Courtesy of © TOYOTA, LICENSE AGREEMENT TMS1002
- REMOVE NO. 3 METER CIRCUIT PLATE
NOTE:
When disassembling the combination meter assembly, eliminate static electricity by touching the vehicle body to prevent the components from being damaged.
- Pull the connector lock in the direction indicated by the arrow in Fig 12, and remove the meter circuit plate.
 Courtesy of © TOYOTA, LICENSE AGREEMENT TMS1002
- REMOVE NO. 4 METER CIRCUIT PLATE
NOTE:
When disassembling the combination meter assembly, eliminate static electricity by touching the vehicle body to prevent the components from being damaged.
- Pull the connector lock in the direction indicated by the arrow in Fig 13, and remove the meter circuit plate.
 Courtesy of © TOYOTA, LICENSE AGREEMENT TMS1002
- REMOVE COMBINATION METER CASE